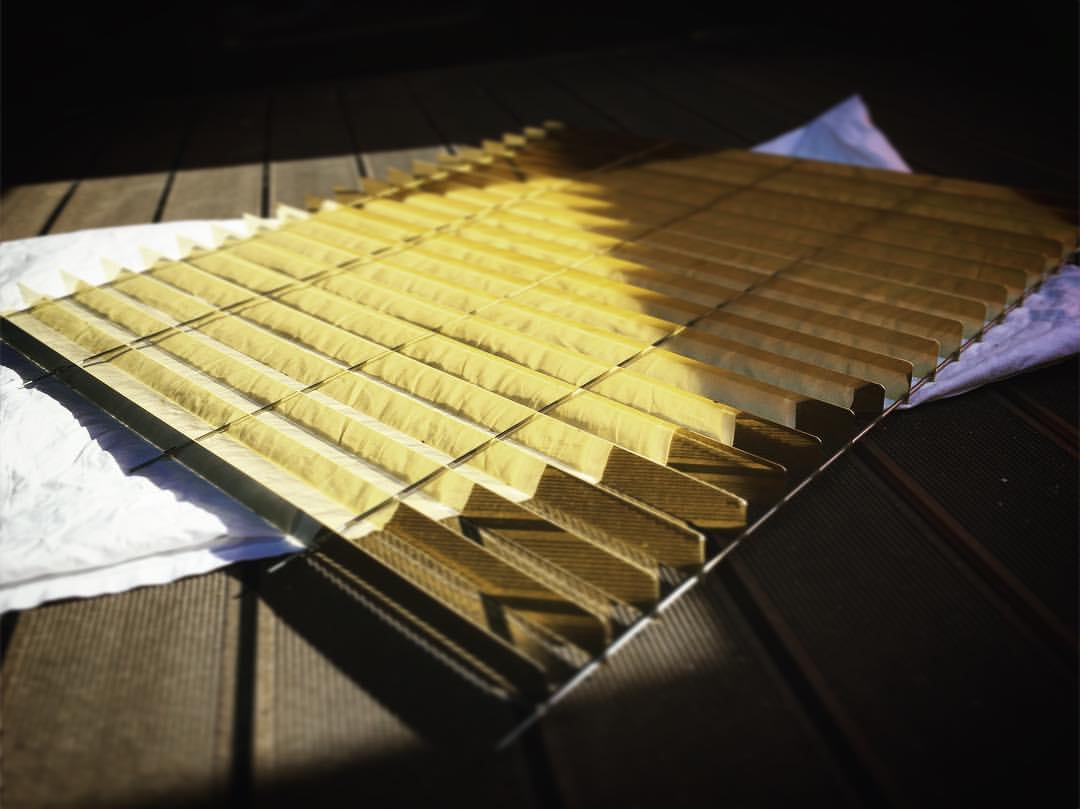
So we try to approach clearing the back log of the recent projects somewhat in a chronological order. First, the back yard, which needed some lights. We decided to keep it simple, and chose Finnish copper lights nicknamed "cone", originally produced by H.C. Westerlund.
Pekka dug the holes (manually, of course) for the three lights aligned across the yard. For Minna's pleasant surprise, he was not gutsy enough to hook up the electricity himself, but instead called our trusted electrician Kaitsu to take care of this part of the project.
So now the backyard has light. The stem of the lights may be a bit too high, but can be shortened later if we so decide. The atmosphere the cone lights create is very nice. We need to take some evening pictures now when it gets dark, it is quite charming!
Sep 24, 2016
Sep 18, 2016
Sofi's wall of fruit
This time, our silence in the blog is not because we have nothing to share. No, it is the other extreme. During the past months, we have made huge progress. But it came with a price. First, through the entire summer we slaved and rushed to meet the August dead line and had no time to write. Afterwards, we simply needed a couple of weeks to recover. So, there are quite a few posts to be published before Christmas!
A brief one to start with is Sofi's room, which has been neglected for way too long (and same goes to Eino's, a topic which we return to later).
The challenge with kids' rooms is of course obvious: how do you make them look fresh and fun with a relatively small investment (as the level of wear and tear in children's rooms is usually exponential compared to anything else, and as in the end, you can't expect anything to leave the room in decent condition).
Answer: wall paper.
We are not really wall paper people. But the more we thought of it the better the idea seemed. Fast, easy, inexpensive, fun. Easy to get rid of and change when the time comes. And after a brief search we came across Photowall. Two minutes after Sofi's approval the order was placed, and a few days later we were ready to go.
Pekka's father, who is well-known about his attention-to-detail attitude, kindly joined Minna for the project. He prepared the wall and had earlier experience on wall papering, which was extremely helpful (considering Minna had none). One day later, the wall was ready.
A simple change, that really made a difference. Sofi was so happy that she made a promise to keep her room always clean (not surprisingly, breaking it a couple of days later).
There will be more. Soon.
| Did I say they were mad? |
A brief one to start with is Sofi's room, which has been neglected for way too long (and same goes to Eino's, a topic which we return to later).
The challenge with kids' rooms is of course obvious: how do you make them look fresh and fun with a relatively small investment (as the level of wear and tear in children's rooms is usually exponential compared to anything else, and as in the end, you can't expect anything to leave the room in decent condition).
Answer: wall paper.
We are not really wall paper people. But the more we thought of it the better the idea seemed. Fast, easy, inexpensive, fun. Easy to get rid of and change when the time comes. And after a brief search we came across Photowall. Two minutes after Sofi's approval the order was placed, and a few days later we were ready to go.
| Preparations |
Pekka's father, who is well-known about his attention-to-detail attitude, kindly joined Minna for the project. He prepared the wall and had earlier experience on wall papering, which was extremely helpful (considering Minna had none). One day later, the wall was ready.
A simple change, that really made a difference. Sofi was so happy that she made a promise to keep her room always clean (not surprisingly, breaking it a couple of days later).
There will be more. Soon.
Jul 18, 2016
Brass is back!
A five week vacation. Way too many projects. Deadline for a photo shoot in August. One would think the mere lack of time would prevent derailment, but in Pekka's case, quite the contrary. The surge of ideas seems endless.
And this is one of them.
It started from the idea of covering the indirect light above the teak wall downstairs with brass lamellas. And just like that, Pekka was in the middle of designing and building a brass lamella plate to be placed under the stairs.
Focus? Momentarily lost. But should he fight the inspiration? Of course not!
![]() |
| Raw materials |
| Cutting aluminium tube |
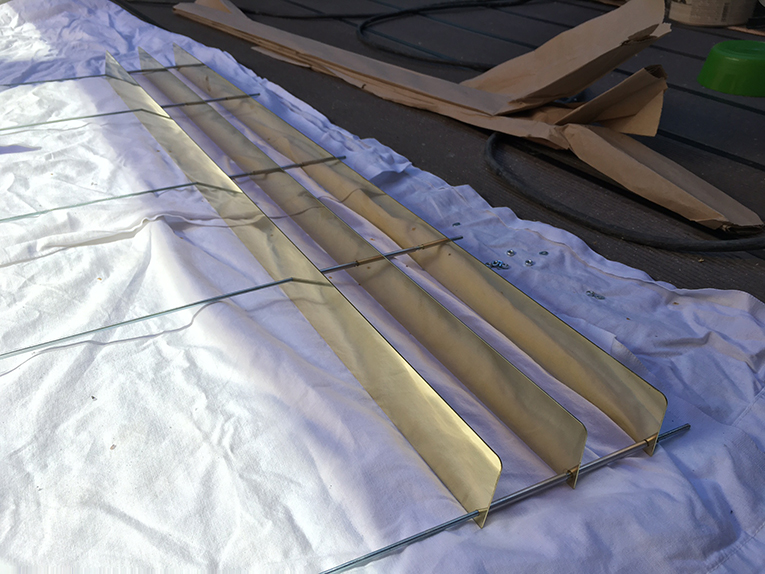
Then he started assembling the structure. Twenty laser cut lamellas were supported by threaded rod and separated by the aluminium tubes.
| Tubes and rods |
| First three lamellas |
With ready materials, it really did not take a very long time to finish.
But what did take a bit more time, was preparing the supporting structure for the brass lamellas. First, he built the parts of the supporting structure.
![]() |
| Fully assembled brass lamella structure |
| Meanwhile under the stairs |
Then he attached them to the ceiling by using angle irons.
| Frame in the making |
Perhaps the most time consuming part was to make the connection invisible. Quite a few rounds of application of filler / sanding was in order next.
| Filler layer X drying |
When the supporting structure was ready and painted, it was finally time to install the brass lamellas, which were attached to a sheet of opaque acrylic to function as a diffuser.
| Ready to be installed |
Pekka used thin iron wire to get the brass lamellas exactly to the position he wanted. Little by little he kept shortening and balancing each of the iron wires until the position was just correct.
![]() |
| Going up |
And what started as a side kick was now ready. It was easy for Minna to agree that this particular astray was absolutely worth it.
Brass definitely is not only back, and but also here to stay.
![]() |
| Light with brass lamellas |
![]() |
| Up and close |
Jul 15, 2016
Slate stairs
Just very briefly - a shot of Urho on the newly finished slate stairs. The rocks on the side are those dug out of the underground when emptying it nearly three years ago. Very practical hiding rain water tubing. And not so bad visually either.
| A middle aged dog on the new stairs |
Jul 13, 2016
Finetuning staircase
Remember how we replaced the old wooden staircase with a pretty rough looking staircase Pekka found, had sand blown, painted and installed? For nearly two years it has been waiting for the finishing touches, including such minor details such as wall attachments in both ends and in the middle to make it less shaky, and a decorative leather wrap around the hand rail.
| Insufficiently supported staircase |
A few weeks ago when summer vacation started, it was back to the work place for Pekka, when he kicked off making of those missing parts. First, some metal work with a lathe...
![]() |
| Lathe at work |
...then continuing by plasma cutting, welding, grinding, sanding and yes, finally painting.
![]() |
| Welded pieces |
![]() |
| Not the expected outcome |
![]() |
| Ready for welding |
Then, with the borrowed welding equipment (Thank you Stenkka!) he was good to go...
![]() |
| Master welder at work |
![]() |
| Permanently connected |
After experiencing all the trouble in the lower end of the staircase, the upper end was a school book example. Indeed, 20 minutes later, Pekka was done. In addition to the ends, he added four more attachments in different parts of the staircase. No more shaking, no more funny noises. Perfect.
![]() |
| Upper end completed |
For the decoration of the hand rail we considered several options. Finally, the decision was done to use a string of cognac coloured leather inspired by the stand of the Senaattori light designed by Lisa Johansson-Pape for Orno.
![]() |
| Senaattori light by Lisa Johansson-Pape |
![]() |
| Piece of leather on a cutting table |
![]() |
| Master cutter at work |
![]() |
| Pile of leather strings ready for staining |
![]() |
| Choise to be made |
So, as soon as we have decided which staining to choose and how to connect the pieces of leather strings together, the story will continue...
![]() |
| Testing consumption |
Jul 5, 2016
Slate terrace - grand finale
Last weekend was a remarkable milestone - finishing one of the longest projects we ever launched, the slate terrace. Had we known when removing the old concrete slates and starting preparing the foundation how long the road will be, we might have considered wood instead of natural slate. Fortunately we had no idea.
The first thing to do was to sand the entire area to smooth the surface. For that, we rented a big sanding machine.
Once all sharpness was gone Pekka continued to remove all smudges of concrete and other dirt. For that, a smaller sanding machines were perfect. However, it quite quickly become evident that a very humble attitude and hours of manual labor down one's knees was required to clean the stones completely, irrespective of the machinery he was using.
After cleaning the slates one by one Pekka proceeded in the washing phase. Still some pretty extensive rubbing was needed to get the area completely clean.
But when cleaned and washed, it was evident that Pekka's careful work was certainly worth every minute and effort invested in this project. It would look great.
Pekka used the same protective coating (Lantania Avo) than for the floor inside. It turns the tone of a slate slightly darker vs. the original, but does not result in a "wet-look". Also, Avo seems to have a bonus effect: it hides away tiny little grains of dirt from the stone surface (something which seems to be characteristic to this type of slate) resulting in visually more homogenous look.
A few more hours of kneeling and rubbing, and the final slates had received a protective coating. And the end result - almost too good to be true. And almost unrealistic, that it is finally ready. Patience and persistence truly do pay off.
Patience and persistence. Yes, I know all about that, says Urho. Two fundamental elements of begging. Just look at this face - how could you resist?
The first thing to do was to sand the entire area to smooth the surface. For that, we rented a big sanding machine.
| Heavy duty sanding machine |
Once all sharpness was gone Pekka continued to remove all smudges of concrete and other dirt. For that, a smaller sanding machines were perfect. However, it quite quickly become evident that a very humble attitude and hours of manual labor down one's knees was required to clean the stones completely, irrespective of the machinery he was using.
| Focus on the details |
After cleaning the slates one by one Pekka proceeded in the washing phase. Still some pretty extensive rubbing was needed to get the area completely clean.
| Manual junk removal |
But when cleaned and washed, it was evident that Pekka's careful work was certainly worth every minute and effort invested in this project. It would look great.
| Sanded and washed |
| Dry and ready for the final coat |
Pekka used the same protective coating (Lantania Avo) than for the floor inside. It turns the tone of a slate slightly darker vs. the original, but does not result in a "wet-look". Also, Avo seems to have a bonus effect: it hides away tiny little grains of dirt from the stone surface (something which seems to be characteristic to this type of slate) resulting in visually more homogenous look.
| Applying protective coating |
A few more hours of kneeling and rubbing, and the final slates had received a protective coating. And the end result - almost too good to be true. And almost unrealistic, that it is finally ready. Patience and persistence truly do pay off.
| Smooth and shiny terrace surface |
Patience and persistence. Yes, I know all about that, says Urho. Two fundamental elements of begging. Just look at this face - how could you resist?
| Dachshund approved |
Jun 21, 2016
Rosy lights and spirea
One of the reasons we decided to not to start from the scratch on the backyard was that it would have been such a shame to rip off the existing plants. Not that we knew what they were. It was almost we had not paid any attention at all to what was growing there before this spring. For our pleasant surprise, a beautiful pink bush started blooming in May. After a bit of research, we identified it to be Rhododendron Rosy Lights. If someone can confirm or advice otherwise, that would be just great!
A bit later in June, another bush suddenly bloomed in white. This one was identified as spirea (Spiraea betulifolia) (suom. koivuangervo) - we think. It is quite of a modest plant, but yet seems to be complementing its surroundings very well.
| Rosy Lights |
| Rosy Lights |
A bit later in June, another bush suddenly bloomed in white. This one was identified as spirea (Spiraea betulifolia) (suom. koivuangervo) - we think. It is quite of a modest plant, but yet seems to be complementing its surroundings very well.
Subscribe to:
Posts (Atom)