Preparing foundation for a concrete floor seems simple and straightforward. And in a way, it is. But if you do it yourself, for a first time, over evenings and weekends after work, some thinking and perseverance is required to get it right.
So here is what we did in the bunker. First, the bed of gravel had to be compacted as much as possible. The easiest way was to rent a plate compactor.
 |
| Plate compactor |
To determine all gravel was equally levelled, we used a laser. So handy that it makes you wonder - how was something like this done before the time of these miraculous pieces of equipment?
 |
| Levelling with a laser |
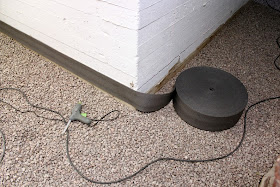
You also need to leave a small space between the wall and concrete floor. To accomplish this, some hot-setting adhesive and foamed plastic were used.
 |
| Rolling out space to be |
Next, the insulation layer made of 50 mm thick expanded polystyrene sheets was fitted in place.
 |
| Last look at the gravel! |
Of course given the irregular shape of the space, there was a lot of detailing to do. Once again, hot-setting adhesive was very useful.
 |
| Glue Master at work |
Sofi also seized the sudden opportunity. It is not very often when colouring the floor is allowed. And it probably shouldn't have been allowed now either, given the guidance regarding consistency in raising kids. But it was just so much fun!
 |
| Guess what is my favourite colour? |
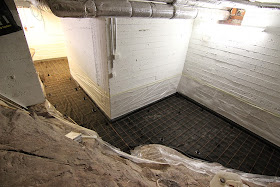
On top of the insulation Pekka unrolled a layer of separation fabric, which was finally followed by a reinforcing steel wire lifted up a few centimetres with plastic holders. This was to ensure the positioning of the reinforcing wire in the middle of the concrete slab.
 |
| Wired |
 |
| Holding up |
The last thing to do was to protect the walls from any potential splashes of concrete. Now, fingers crossed all goes well with the concrete delivery and we soon have a floor underground!
 |
| Ready for some concrete action |


No comments:
Post a Comment